Simple 3D Movement
Objective
This is a very simple way to create movement in Unity using Legacy and The New Input Manager
Outcome
By The End you should understand:
- How To Move an Object
- Basic Of Input Manager
- Basic of New Input System
So, you’ve decided you want to create a Unity Project. You set up the project get familiar with the engine and then stumbled across the question; how can I move this Object in Game? Well Don’t fear in this entry you’ll find a way to move an Object in the Game Window on Play. This is a very basic and easy script to make and it’s a foundation that you can add to for your project.
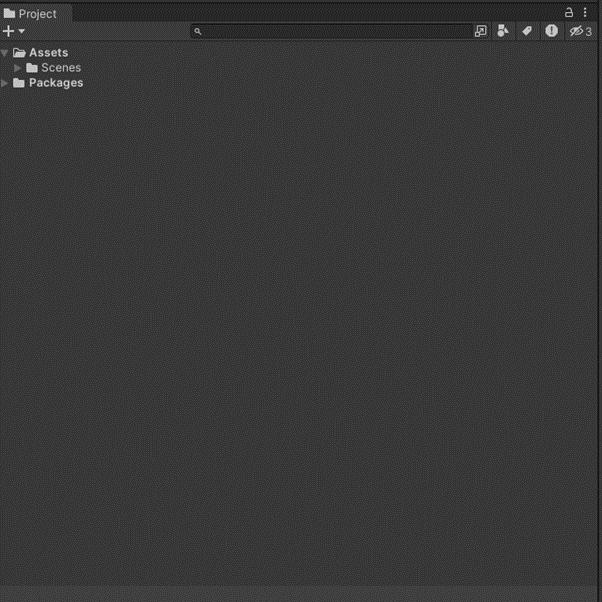
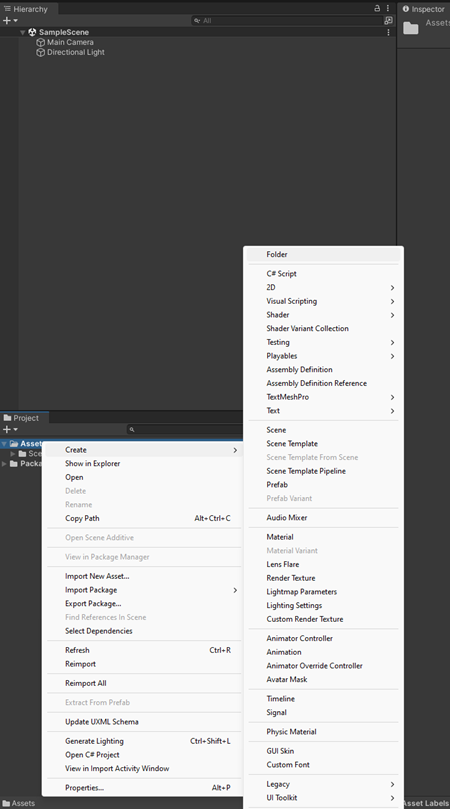
We firstly want to add a few files here just to add some structure to your assets I added some here just for this example. To add a folder right click on the “Assets” Folder and then click folder at the top. Create as many folders as you want these are just ways to store and order your assets.

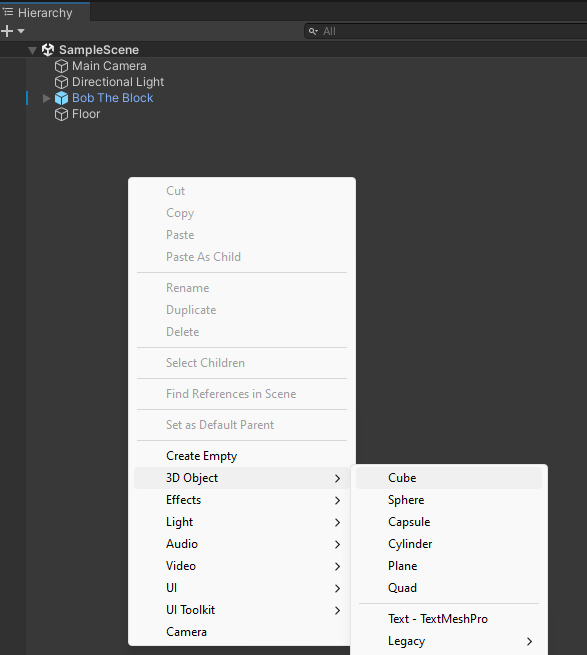
Next for me was to create Bob, yeah that’s right, I gave an Object a name, Bob the Block a rocky blocky kind of Object they are. Bob always wears his shades to the movement party. To make Bob I just resized a cube object and made another. Cube object as a child object for his very fancy sunglasses. To make objects
just right click in the “Hierarchy” tab. Me changing how the cube look doesn’t change the functionality we’re achieving here. We are still aiming for the classic WASD movement. Forward, Backwards, left and right. This type of movement is traditionally among game players and the developers that create the movement mechanics.

After I created Bob, you may have seen that I create a Prefab Folder – Without diving to deep prefabs are handy and great to use since they simply make an Instance of your Object. If you’ve created a player character and want to add them to another scene prefabs are a way to do this without having to remake or reattach multiple objects together you simple just drag and drop. To make a Prefab just drag your hierarchy object into the Assets folder and this will make it a prefab.
Now for the script. Well firstly I just want to touch base on the Inputs we are using here. In this script I am going to show two examples on how to detect Input. One is Unity’s Legacy input system which can be found by going to Edit/Project settings – Inside Project settings click “Input Manager” When you do this, you’ll see this window. Unity kindly make Key Binds for us which we can call in our scripts we can also make our own for whatever types of inputs we need for our Projects. This is the old way of detecting Input but regardless I will show you a way to detect this Input. Another way would be to use Unity’s New Input System, for me this system is a lot easier and cleaner to use for your scripts and theres a lot of ways to make it work.I’m also going to show you that too. Let’s start 😊

Legacy Input System:
First make a script in Unity – Right Click on the asset folder and click C# Script – Give your script a name and then we can begin.
    using System.Collections;
    using System.Collections.Generic;
    using UnityEngine;

    public class Simple_3D_Move : MonoBehaviour
    {

        // Variables
        // The Direction we are currently moving in
        public Vector3 moveDirection;
        // The Physics Component needed to move
        private Rigidbody rb;
        // The Speed that we move at
        public float moveSpeed = 5f;

        // Start is called before the first frame update
        void Start()
        {
            // Make a Rigibody Physics Component in the Unity Inspector During Runtime
            rb = gameObject.AddComponent<Rigidbody>();
            // Turn Off the Gravity Of The Component
            rb.useGravity = false;
            // Freeze all rotation
            rb.freezeRotation = true;
        }

        // Update is called once per frame
        void Update()
        {
            // Store the Horizontal Axis In The Legacy Input System (A, D Left, Right)
            float Hor = Input.GetAxis("Horizontal");
            // Store the Vertical Axis In The Legacy Input System (W, S Forward, Backward)
            float ver = Input.GetAxis("Vertical");
            // Add the Input Values from the two floats to the Vector3 Axis on the X, Z axis. Leave Y Blank (Jump Axis)
            moveDirection = new Vector3(Hor, 0, ver).normalized;

        }
        // Call all Physics Updates On Fixed Update
        private void FixedUpdate()
        {
            // Move Our Rigibody Component with it's velocity property on the Axis we declared via Input.
            rb.velocity = new Vector3(moveDirection.x * moveSpeed, 0 ,moveDirection.z * moveSpeed);
        }
    }
This is my basic script for moving. Please see the code comments to aid your understanding. From the script you can see that to get Input I need to call the Input System by using “Input” and then calling the Axis. If we look back to the Input Manager, we can see that the key binds are actually called Axis. So, when we say Input.GetAxis – This just means we are calling a specific Axis within the list of Axis. Then the next step is to use a string to call the name of that Axis. So put into plain sense:
Input.GetAxis(“NameOfMyAxis”); = Input Manager -> Get a Declared Axis -> Naming the Declared Axis I want to use
You may ask yourself how does the Input Manager know what keys I want to press? Well, if you go back to your Input Manager you will see if you extend the Axis there are some values we can change. This is where we can set the keys that the Axis supports and also detects what keys the player presses and we simply script what they do. This approach prevents us from doing unclean code. As without this you’d need to write multiple If Conditions to achieve a simple movement in one direction. So, you’d have 4 if statements per 4 directions you want to go in.
New Input System:
The new input system is going to require you to install it. But this is very simple. Just go to Package Manager under Windows.
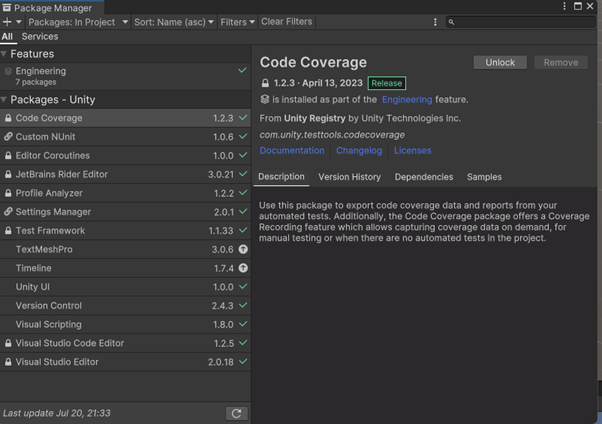
You should now see this Window. You can now see the Packages that are pre built into your project. But to find the Input Manager Click on where it says “In Project” and then click on Unity Registered. You will find the package as you scroll down. You’ll need to install this so this Input System takes priority over the Legacy one.
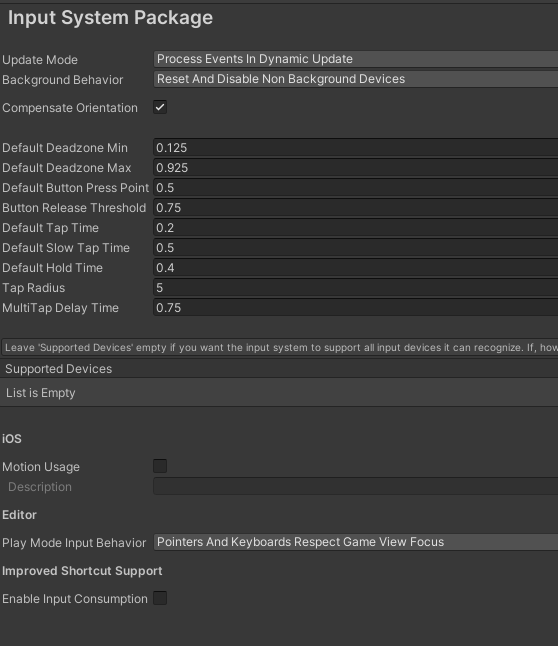
Unity will restart and when it does, we can then get going. When we have it installed we can start by checking to see if we have a “Input System Package Asset” In most versions of unity it won’t be auto generated. But to check go to -Edit/Project Settings – Then go to Input System Package and click the big button that says “Create settings asset”. If you don’t see this then you most likely have an asset made. After you have done this we can start to make our new key maps.
If you go to your C# Script where you can change your script to the one that follows.
using System.Collections;
using System.Collections.Generic;
using UnityEngine;
using UnityEngine.InputSystem; // We make this to reference the new system
public class Simple_3D_Move : MonoBehaviour
{
// Variables
// The Direction we are currently moving in
public Vector3 moveDirection;
// The Physics Component needed to move
private Rigidbody rb;
// The Speed that we move at
public float moveSpeed = 5f;
// Input System Call
public InputAction playerMove;
private void OnEnable()
{
playerMove.Enable();
}
private void OnDisable()
{
playerMove.Disable();
}
// Start is called before the first frame update
void Start()
{
// Make a Rigibody Physics Component in the Unity Inspector During Runtime
rb = gameObject.AddComponent<Rigidbody>();
// Turn Off the Gravity Of The Component
rb.useGravity = false;
// Freeze all rotation
rb.freezeRotation = true;
}
// Update is called once per frame
void Update()
{
// Store the Horizontal Axis In The Legacy Input System (A, D Left, Right)
//float Hor = Input.GetAxis("Horizontal");
// Store the Vertical Axis In The Legacy Input System (W, S Forward, Backward)
//float ver = Input.GetAxis("Vertical");
// Add the Input Values from the two floats to the Vector3 Axis on the X, Z axis. Leave Y Blank (Jump Axis)
//moveDirection = new Vector3(Hor, 0, ver).normalized;
moveDirection = playerMove.ReadValue<Vector3>();
}
// Call all Physics Updates On Fixed Update
private void FixedUpdate()
{
// Move Our Rigibody Component with it's velocity property on the Axis we declared via Input.
rb.velocity = new Vector3(moveDirection.x * moveSpeed, 0 ,moveDirection.z * moveSpeed);
}
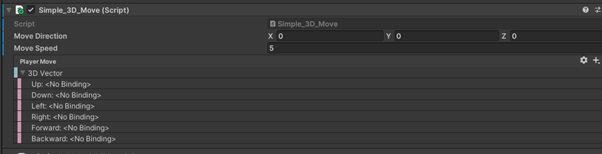
}You can see from the Code I have made a variable of type “InputAction” this is a way we are going to control our Inputs. If we look at our script in our Inspector you can see that you can add something. Press the Plus Icon and then add ![]() This is a Vector3 Composite which looks like this
This is a Vector3 Composite which looks like this

Mine look like this
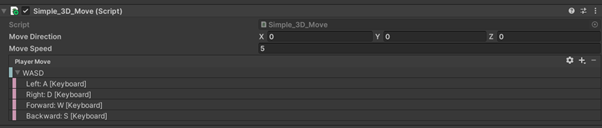
I removed up and down as this is for the Y Axis and I would rather have a separate action for this since it’ll move the Object up on the Y if we decide to insert a key bind. You’d just need to change the following line to have MoveDirection.Y instead of a 0 value.
rb.velocity = new Vector3(moveDirection.x * moveSpeed, 0 ,moveDirection.z * moveSpeed);
But tada that’s essentially a very basic look at how to move your character around. Feel free to download to package from my GitHub