This shows how to make a Shared drive using Windows Server 2022 and VMWare. Creating a shared drive to assign to a user and using Group Policy to pull it through onto another machine.
Outcome
By the end you should see how I’ve created the map drive and the components needed to allow it to work.
For Me the though of making a shared drive seemed to be knowledge out of my reach. Why? Being a small 1st Line Engineer currently it was hard to imagine what I would even need to do. Well like most things its teachable and in this instalment, I made a shared drive using VMWare on my domain controller and connected it to my client VM. Let me explain.
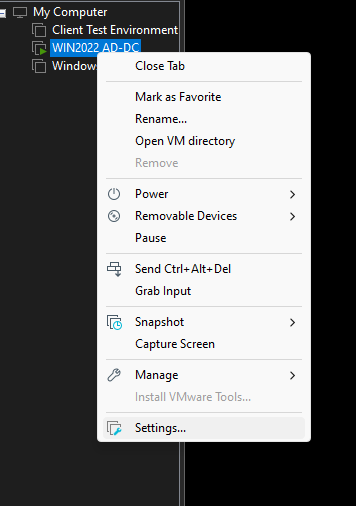
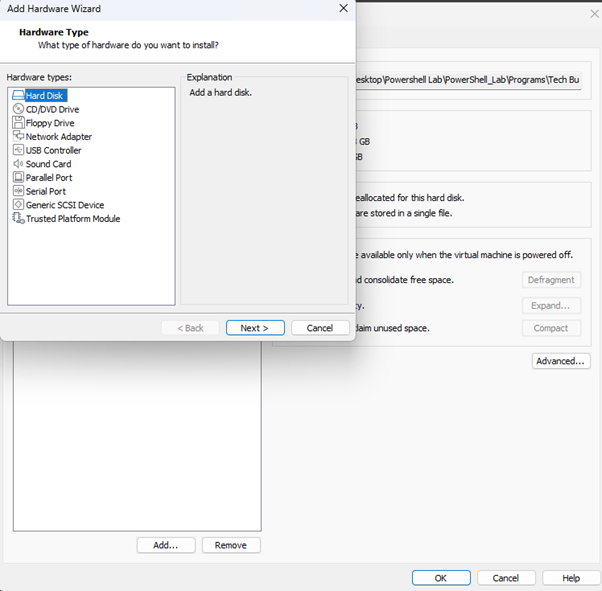
Firstly from preference I wanted to store all my “Mapped Drives” to a separate drive away from the C:/. Why? Just so my environment felt cleaner and easier to manage. Just a simple me thing. So where did I start? Well I started with making my new Virtual Hard Drive. I went to the settings of my AD-DC, I then added a NVMe drive. I then went onto my server to check it out.
AD DC Settings
Creating a New Virtual Disk
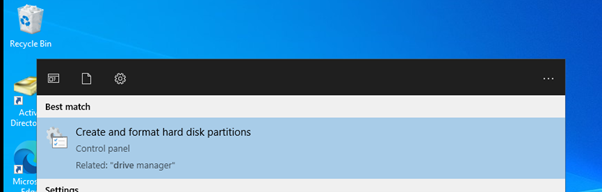
Going to settings to partition the disk
Partitioning the disk
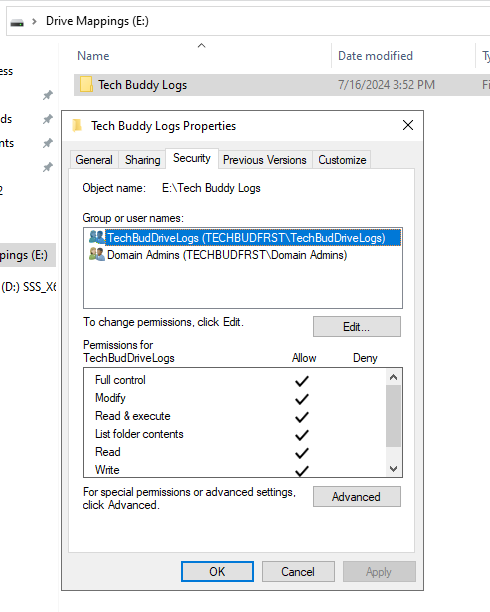
I wanted my drive to have a permission which said, if I have this Group applied to a user account that user would then get access to my drive. So how did I do that? Simple. I made 2 folders inside Active Directory users & Computers. One was called _Users, there is where all my users are going to go, The other was called U Groups.
Inside the U Groups I made a Group which I would use to assign users the right access to my shared drive and the users account was simply a location to place all the users I am making to manage easier. It also meant I could find it in the Policy Panel. After this I made sure to add the group to the security properties of my mapped drive folder, I then made sure the folder was shared
Adding Made U Group to the Secuirty Settings of the Folder
Enabling Sharing
Once this was all set, I went to Group policy management to make a policy that would support the group I just made. So, what I did was made a policy inside the _Users Organisation Folder which essentially told Objects concerned that if I have the correct U group assigned to the user I would allow them access to the Mapped Drive by creating it.
I went to the server Manager, clicked tools and then pressed “Group Policy Management”
I scrolled down to my _Users Folder, right clicked and then added a new policy.
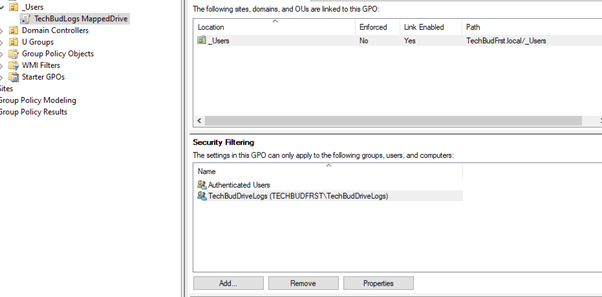
When it was made, I made sure to add the group I made to the security filtering. This way the Policy applies only to the specific groups. In this case I have a user who has been assigned the group TechBudDriveLogs.
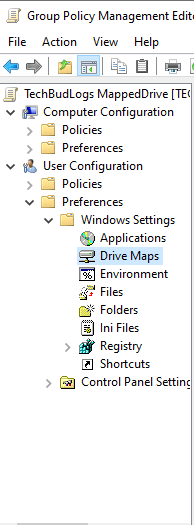
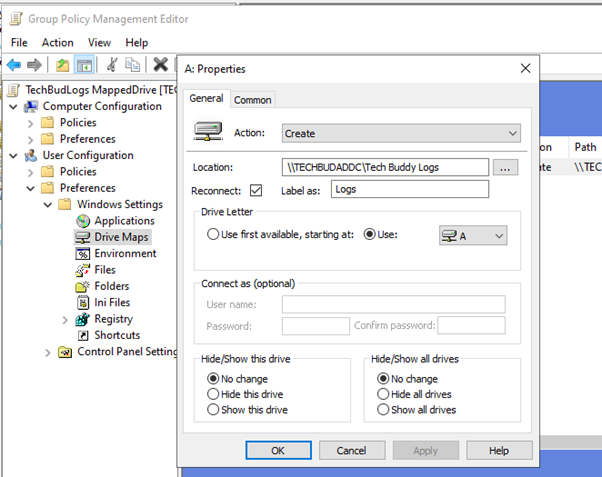
Since I’ve made the policy, I then decided to right click on it and edit the policy I then made my way down to Mapped Drives.; I right clicked on this and added a new Mapped drive with the following data attached.
Group Policy Management
Policy Properties
Mapped Drive Setiings
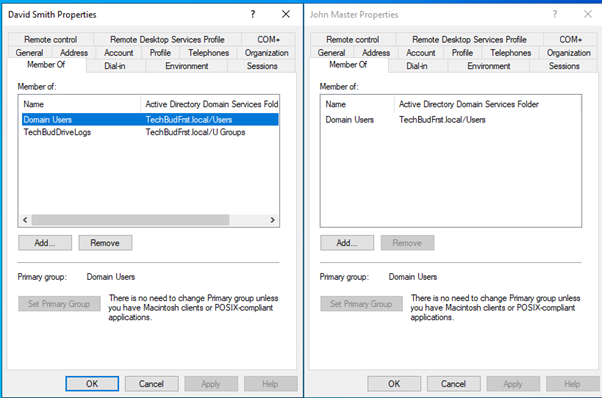
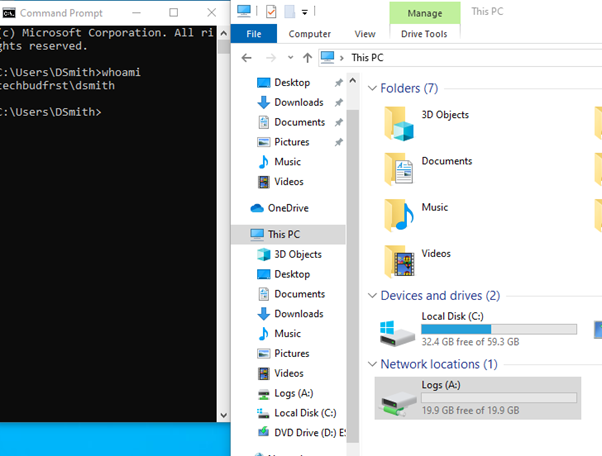
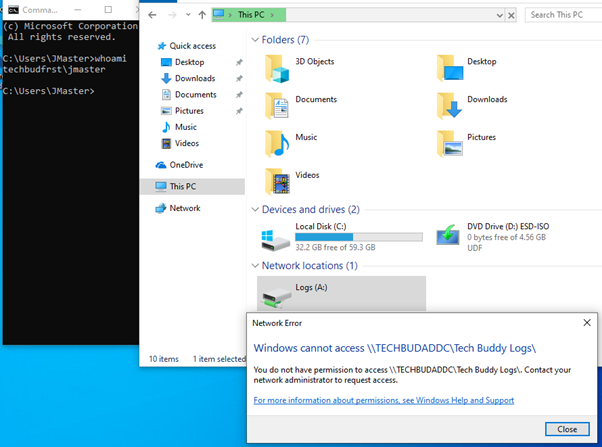
All this considered we are now ready to test. As mentioned, I have added the group to one of my user accounts. You can see this here:
One has the group assigned and one does not. So all things considered if I now run a gpupdate for David Smith, the mapped drive should appear automatically whereas John Masters should not see the drive.
With Access
Without Access
You can see with David Smith they have access to the drive showing our policy is working and using the U group as a way to allow access. Whereas John Masters does not have access since the group is not applied to their account.
Now in the future I will probably make it impossible for users to see the mapped drives if they have no access but for now this is a very basic way that I made a mapped drive for a domain controller.